Nearly everybody's Mother made (or makes) the world's best apple pie...........at least that's how it was when I was growing up.......my Mom was no exception.
She followed the recipe in
The Better Homes and Garden Cookbook to the letter, but still there was something special about Mom's pie.
When I went away to Marine Corps boot camp, I wrote home often and in the course of that correspondence I told her that I wanted an apple pie when I got home on boot camp leave.
Sure enough, the day I got home I was greeted by the cinnamon smell of apple pie drifting through the house......and I can only say that it was indeed heavenly after 3 months of government issue chow. We pretty much demolished the pie after dinner, and I went out to find old buddies to get into trouble with.........I drifted back to the house in the wee hours with a pretty fair load on and went to sleep.
When I woke up I could still smell that cinnamon smell and when I stumbled out to the kitchen, Lo and behold, there was another pie cooling on the kitchen table.
You can probably guess where this is going, can't you?
Yep..............in the three months I was gone, Mom had assembled and frozen 20 apple pies. She had peeled, cored, and sliced 30 pounds of apples.
Mixed the dough for forty crusts.
..........and each day I was home she pulled out a new pie and baked it!
........ and ,By God, I ate it.
I never had the heart to tell her how sick I was of apple pie after about the 3rd day..........and I never had the heart to tell her that freezing the pies had changed the texture of them and made them taste like canned pie filling.
I dove into those pies each day like they were redheaded teenaged twins with no pubic hair...........I gained nearly 15 pounds before I got back to San Diego and swore I'd be a little more circumspect the next time I asked my Mom for something special to eat when I came home on leave.
I only messed up in that regard one other time after that.........remind me to tell you the fruitcake story someday.
Gotta love Moms............
In time my mother more or less retired from cooking and, for holiday dinners, I more or less took over.
When I looked at and tasted the first two pies I made, I knew there was something missing..........something not quite right. I followed the same recipe, but they were different somehow.........not as big as I remembered them and not as cinnamon-y.
Of course, I'd grown up in the mean time and had trashed my taste buds with beer and cigarettes for 15 years or so. So,as is my wont...., I started tweaking the recipe.
If the mountain won't come to Muhammad........we'll just haul ol' Muhammad to the mountain.
So, the pies I make now are huge.........they have double the apples in them that Mom used ( three pounds per pie), they are 10 inch pies instead of the 8 inch pies that she made, and have twice the sugar and 4 times the spices that her pies did.
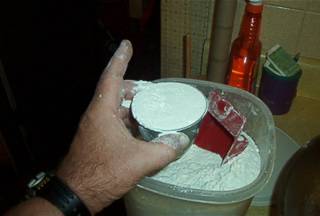
Before I get started, I want to turn you on to one of the niftiest little tools in the whole wide world................and say a word or two about pie crust.
Peeling the apples is the most tedious task involved in making an apple pie. If you've got the time, it's a good ol' sittin' on the front porch, chillin' out and whittlin' apples, Andy and Opie, sort of thing to do...........country zen, you might say.
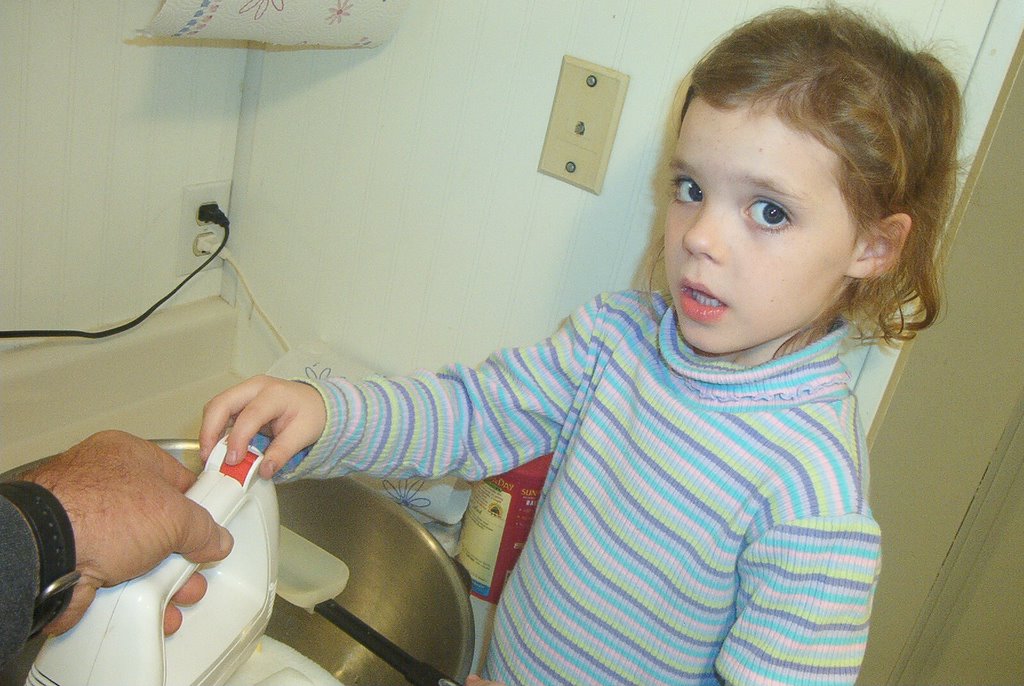
If you've got willing helpers..........it takes no time for two or three people to peel 6 pounds of apples, makes them feel like part of the process and frees you to make the dough.......thereby cutting in half the time it takes to get the pies into the oven. It also turns the whole procedure into a team effort. This a task that can be turned over to the guys.......it won't interfere with the football game and involves razor sharp knives which is a manly thing.. It also allows you to concentrate your efforts in getting the crusts ready, which can be pretty tricky and frustrating if you are not practiced at it.
.........but, if you can't count on your helpers not to pare off half the apple in the process of getting the skin off, or to make the uniformly thin slices that this "enlarged" recipe calls for, or your helpers are your kids and you want them to feel involved with the process, or introduce them to the kitchen in a fun and productive and safe way (no razor sharp knives), then the apple peeler, corer, slicer is the way to go.
A heavy duty,
suction base model is available on line for about $25.00 and a
clamp base model is available for $19.00.
I have the clamp based model and though it is a bit tricky to find a good place to clamp it sometimes, mine works like a charm and I wouldn't want to be without it.
Given that the suction base had a powerful suction, I would recommend it, except that I have no experience with it.........it's your call.
Either model has the same features with the difference solely residing in how they are fixed to your work surface...........and with it, I can peel, core, and perfectly slice 6 pounds of apples in less than 10 minutes start to finish.
You might argue that $25.00 is a lot of money to sink into a tool that you will use once or twice a year. To which I would counter: A) if the process of prepping apples were made easy and quick, you might make more apple pies.....(and other apple goodies), B)this is a heavy duty tool that will last you practically forever and be there whenever the spirit moves you, thereby saving you time and effort, increase your productivity and prove a wise investment in the long term.
In regards to pie crusts, this is the tricky part of pie making........a pie crust can be a bitch to handle from the rolling surface to the pan.
You can buy a ready made 9 inch crust from the grocery store (for about three bucks a pie).........but that is a lot of money to spend on something you can make yourself for about 50 cents, and a 9 inch crust is not big enough for the monsters I make........again, your call.
I say.........learn how to handle a pie crust........
Here are a few tips.
The right recipe can make all the difference in the world.........here's a good one:
4 cups flour
1 tablespoon sugar
1 1/2 teaspoon salt
1 1/2 cups shortening
1/2 cup cold water
1 tablespoon vinegar
1 egg
Mix the dry ingredients together
cut in shortening
whisk liquid ingredients together and work into the dough until it will form into a non-sticky ball (don't overwork dough)
let dough rest in refrigerator until you are ready to work it into crusts.....it works better if it is chilled
when mixing dough.......flour your hands a bit to keep dough from sticking to hands
after a while it will stick to itself and unstick from your hands
This recipe was given to my Mom by my Aunt Ruth, who spent over 30 years as a professional cook specializing in pastries and pies, and declared it the best recipe she'd ever found.
For those of you who like science, something about the vinegar and the gluten in the wheat flour works to make the dough produced a little more "handle-able" and forgiving.
This recipe will make crusts for two double crust 9" pies, which pretty easily and with practice can be stretched to cover the 10" monsters I make..........
I increase the recipe by one half (takes a bit of math......and no I don't try to measure half an egg........I just throw in another egg and kind of sneak in extra flour to compensate a little at a time)........which gives me a bit of extra dough to work with. If you want to be real frugal with the left-over dough, you can make little shells (bake them for 6 to 10 minutes) and freeze them.........Nuke them when you want to use them and fill them with pudding or a fruit compote for individual deserts.
Let's get to work...........
You will need:
6 pounds of apples
a big tub or bowl of water and lemon juice concentrate (or vinegar)
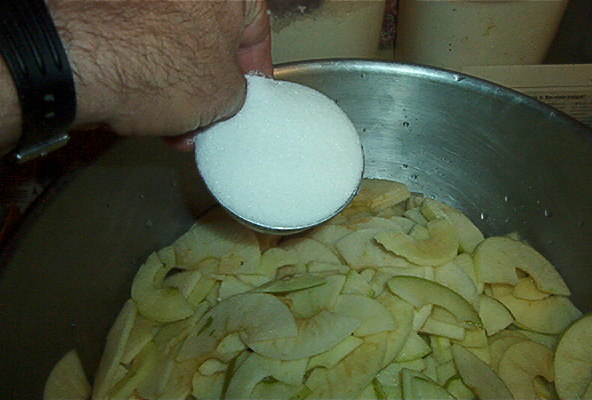
4 heaping cups of sugar
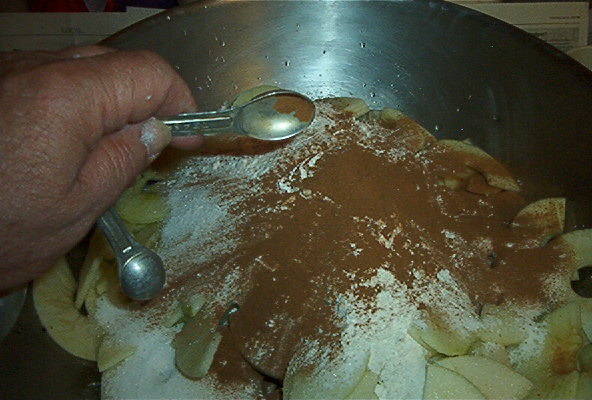
8 teaspoons of cinnamon
8 dashes of nutmeg
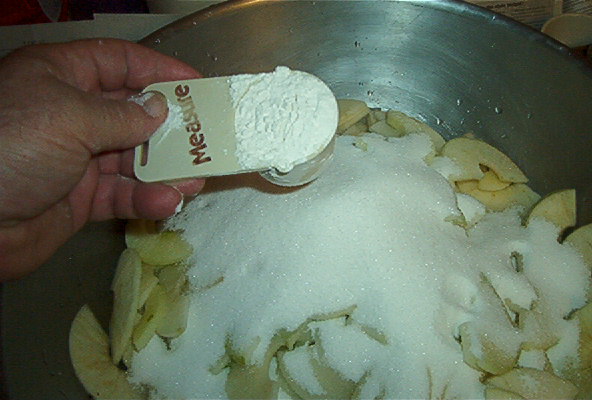
1/2 cup flour
a couple sticks of butter (or some of that yellow shit that tastes like butter)
a couple of egg whites.......
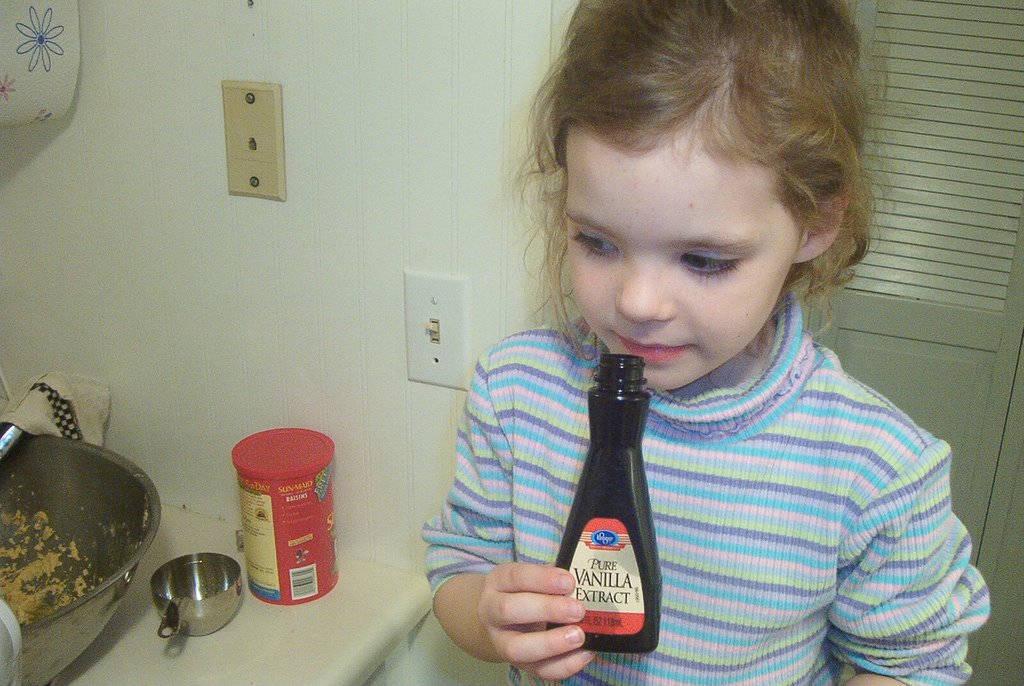
Before I forget....these are big, fucking pies! Get full, 10 inch
deep dish pie pans.
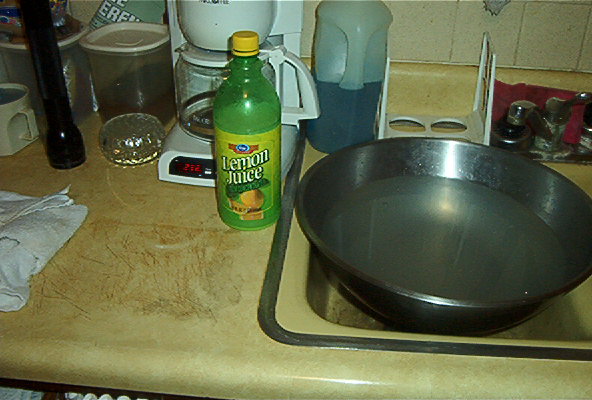
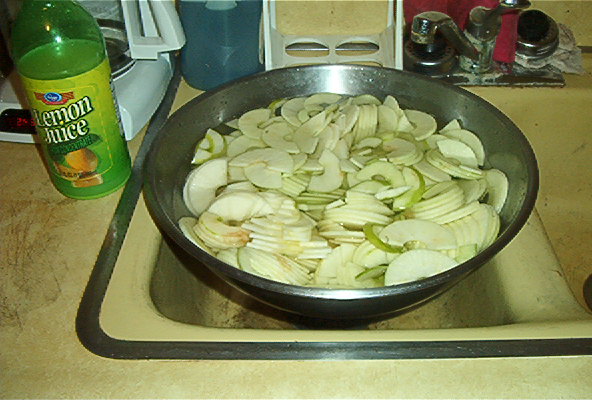
Fill a plastic tub or large bowl part way with water and pour in some lemon juice concentrate or vinegar........this will recieve the peeled apples and the juice (or vinegar) will keep them from turning brown)
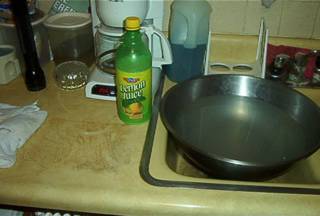
water and lemon juice
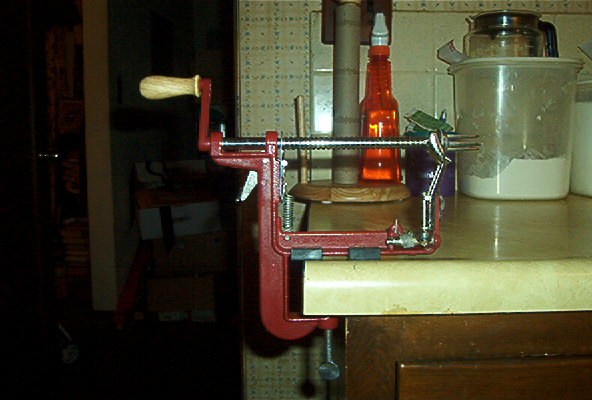
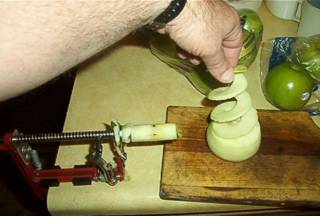
and set up the peeler

Da peeler
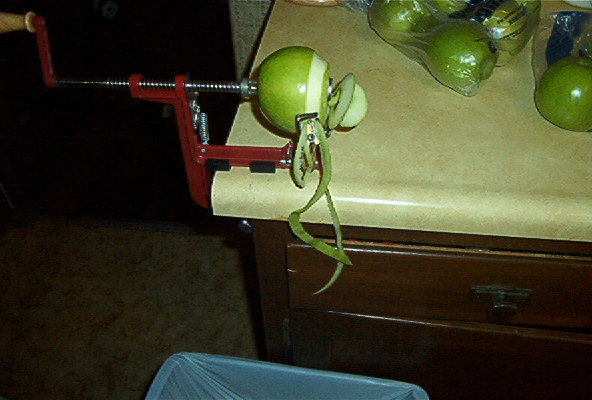
Behold and be amazed...........be very amazed!!

peeler in action
after peeling
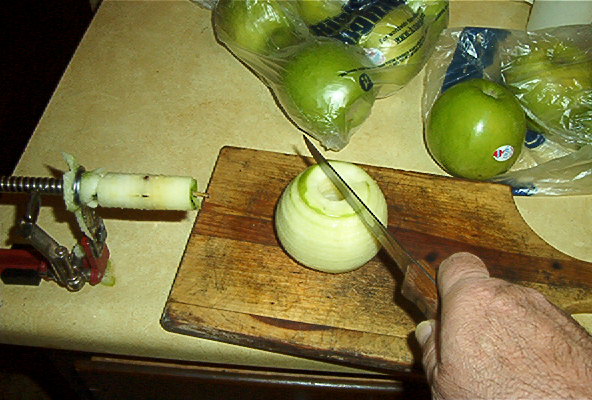
Rendering the peeled, cored apple into slices is a simple matter of cutting the apple in half.......dont worry about the wee bit of peel left on the apple by the peeler, no peeler I've ever used will get it all. The remaining bit here will not be noticeable in your pie.
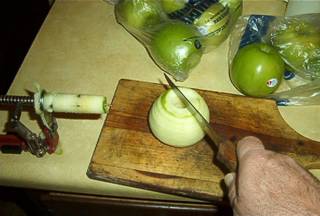
cut into slices
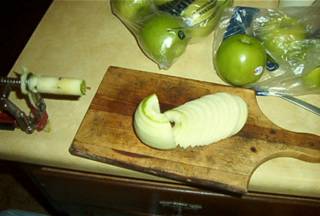
slices

bowl of slices
Voila.........easy as..........well, pie!....and it only took about 9 minutes.
Whether you go out and get a peeler or not, you will save a truck load of time if you hand select large, unblemished apples ( I use a Granny Smith, by the way) rather than buying two, three pound bags of apples.
I know this may contradict my advocacy of the frugal approach.......but time and effort, to me, are parts of the equation when considering what is frugal.
A three pound bag of apples will contain about 9 to 11 or 12 medium apples.....the more apples you have to peel, the longer it will take to peel them.
Three pounds of large apples is about 5 or 6 apples........ fewer apples, less time, more flesh, less waste all around!
Apples in a bag are more likely to have bruises and bad spots that you cant see, meaning more waste of good apple flesh........
The difference in price........might be about one or two dollars. It's worth it.
We'll leave our bowl of apple slices alone for a while and make the dough and prepare the bottom crusts to recieve the filling.........
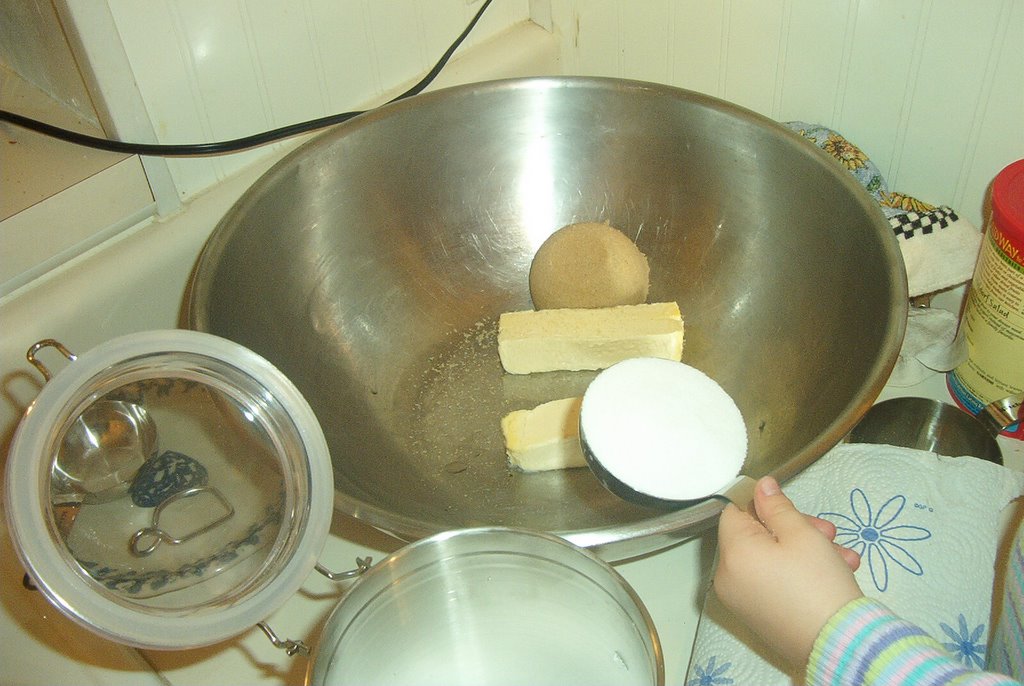
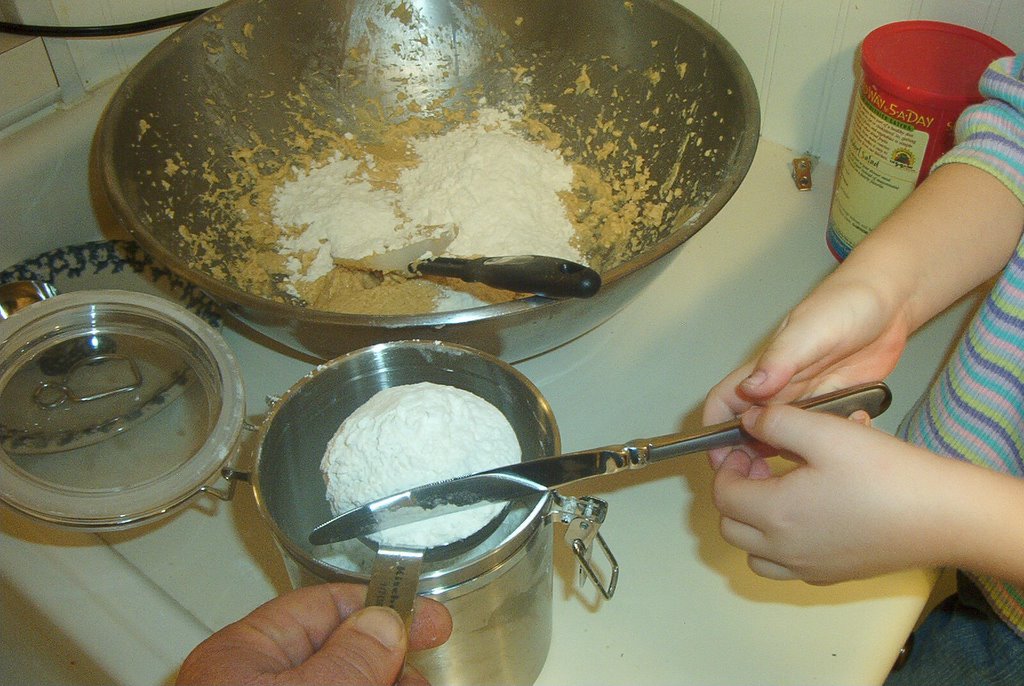
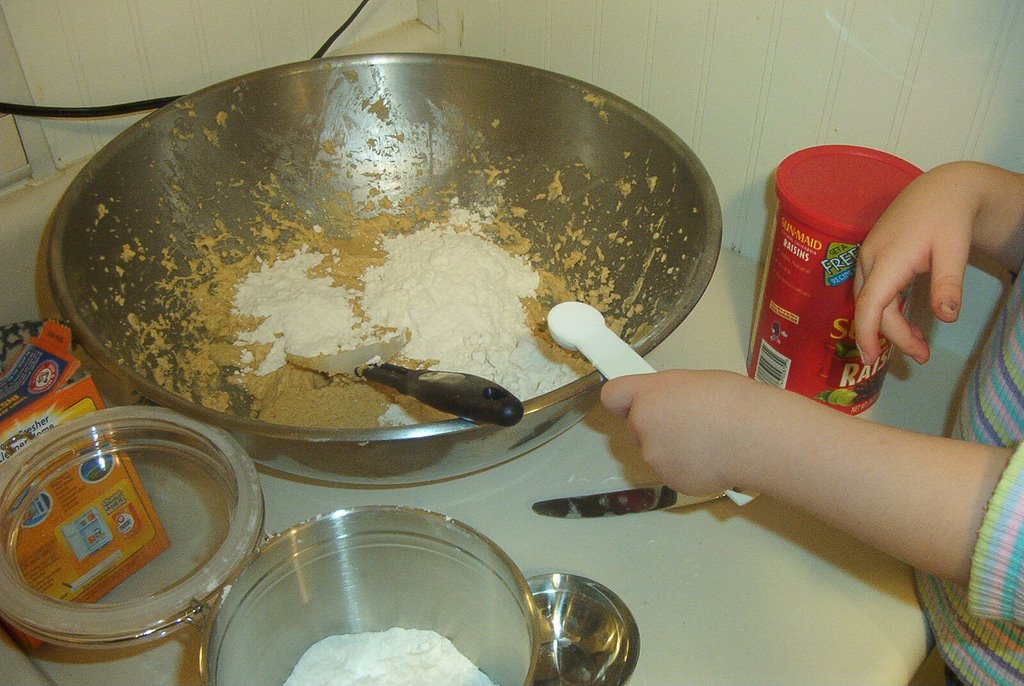
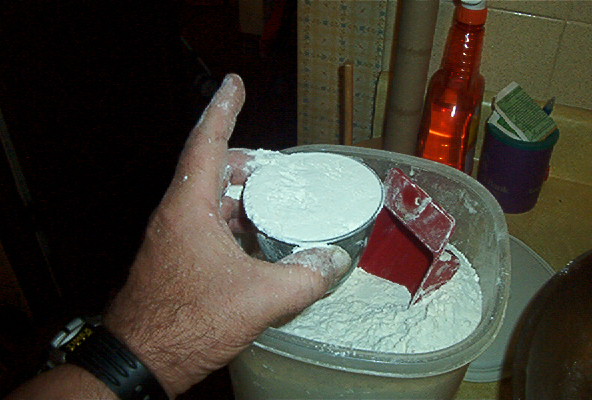
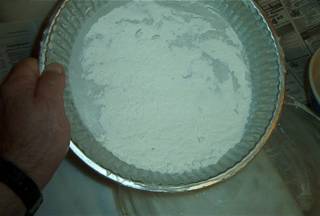
Measure your dry ingredients into a large mixing bowl and stir around a bit to mix the salt and sugar into the flour
the dry ingredients
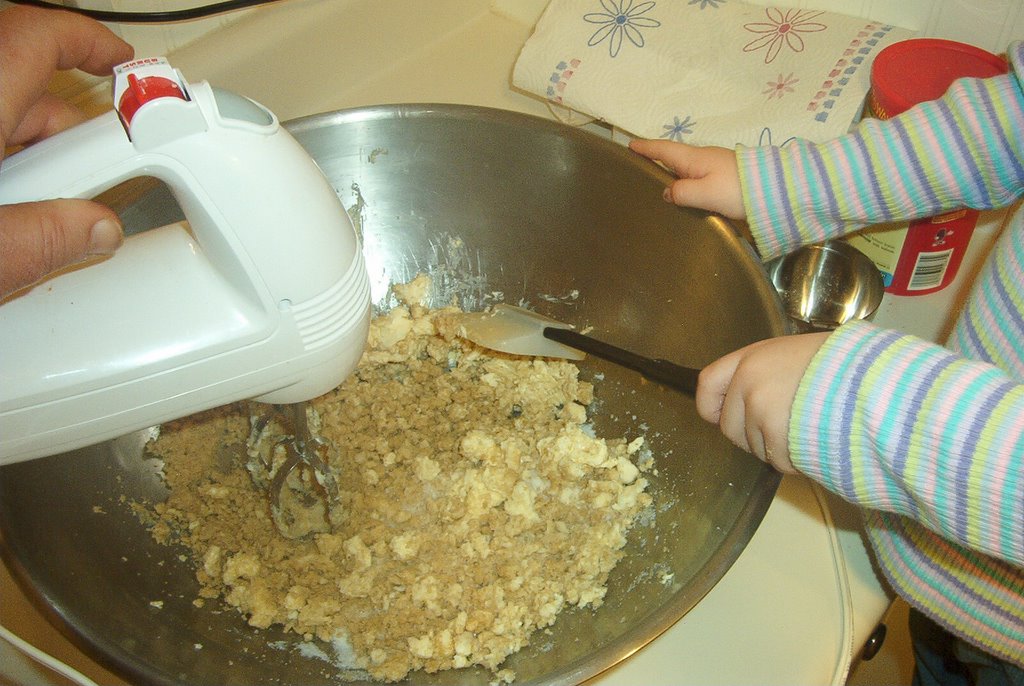
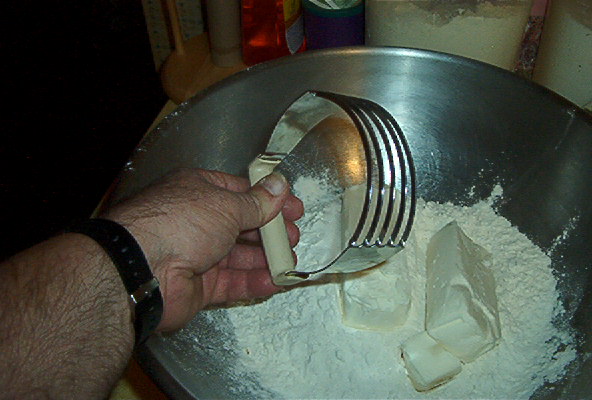
Measure the shortening into the dry ingredients and use a dough cutter to "cut" the shortening into the dry ingredients..........
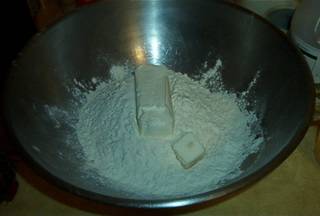
shortening
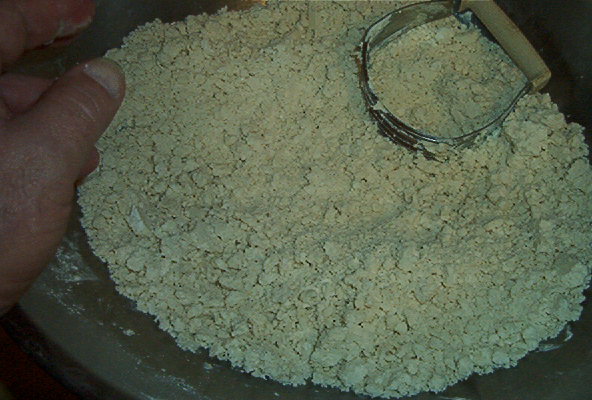
Using a dough cutter, you want to mix the shortening into the flour until you have a bowl full of pebble sized "crumblies".........
if you don't have a dough cutter, just throw your liquid ingredients in at this point and dig in with both hands.........it's a little messier, but hey....kinda fun......and it gets the job done all the same.
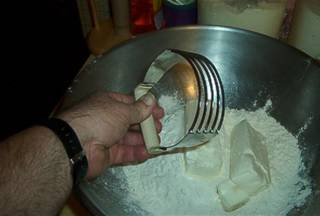
cut in shortening

ready for liquid ingredients
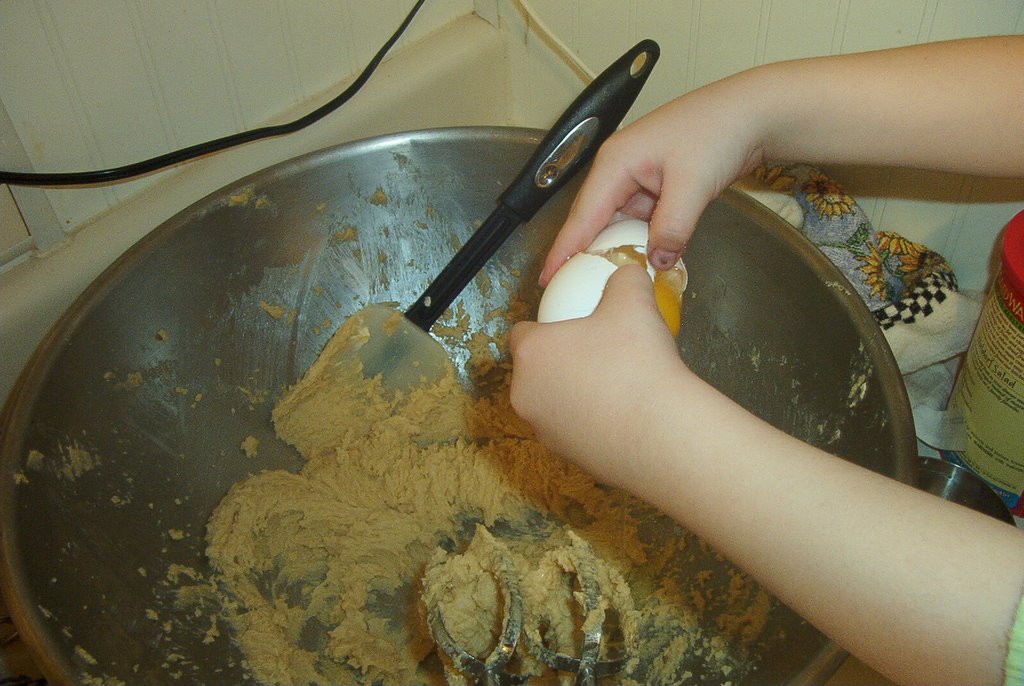
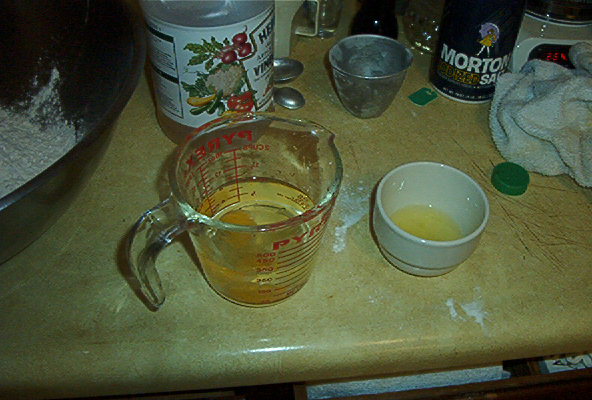
Now to measure the liquid ingredients and whisk them together........
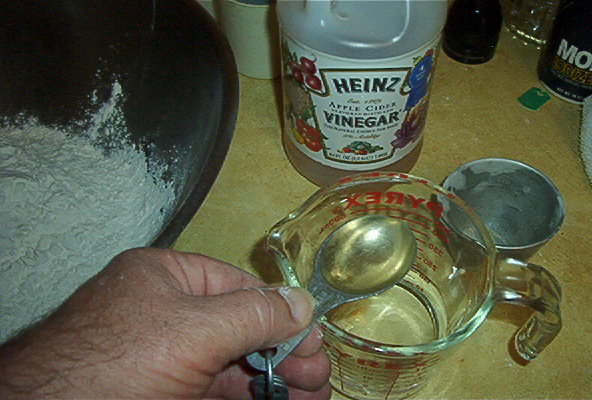
Start with cold water and measure the vinegar into it and add the egg.
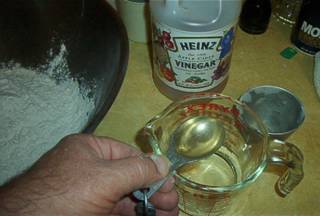
add vinegar
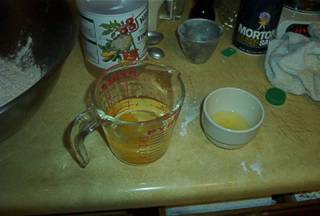
and egg
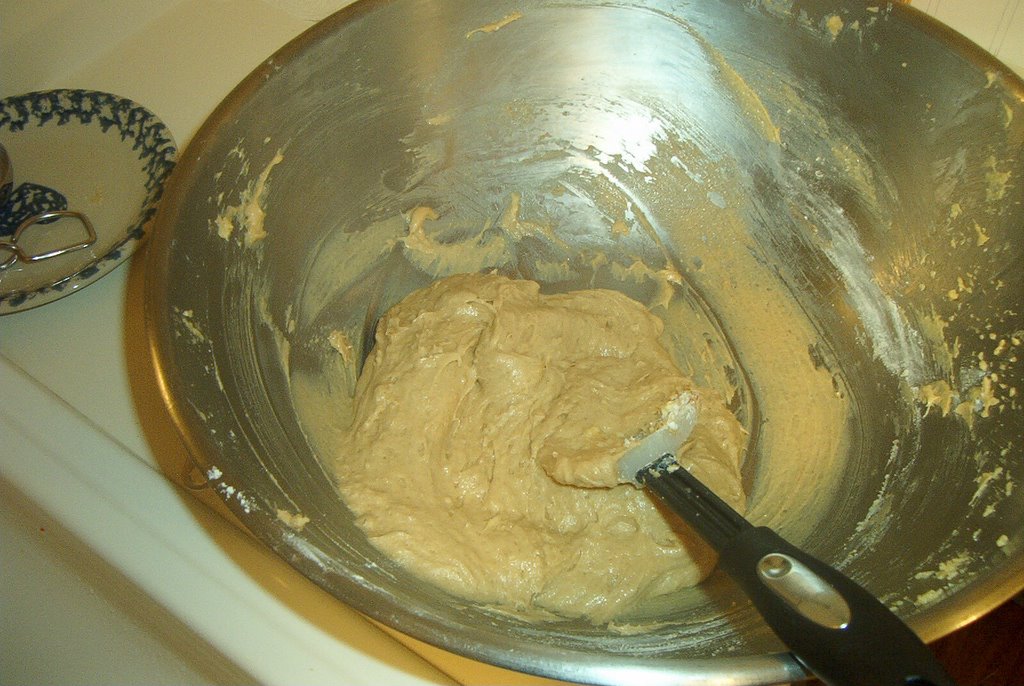
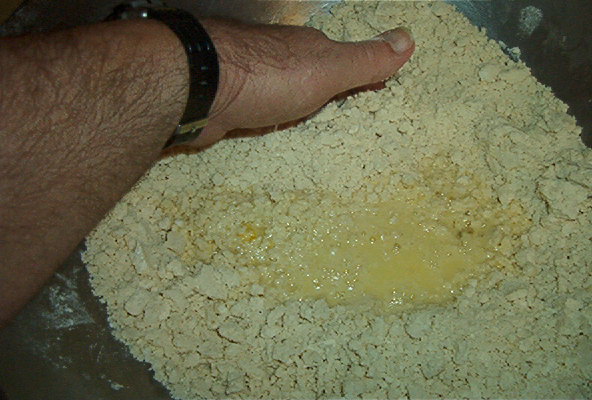
Whisk this around a bit to make a homogenous mixture and pour it into your flour and shortening and start mixing it all together with your hands......you can flour your hands after a bit to help release the sticky dough from your hands as the dough forms.

incorporate liquid into flour and shortening
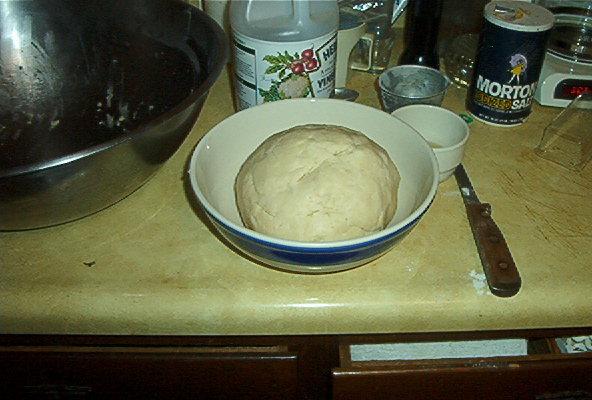
Once youve formed a ball of dough, you can transfer it to a bit smaller bowl, drape a dampened towel over it and set it in the 'fridge for a while to rest and chill.......and you can grease and flour your pie pans and take a beer/smoke/pee/whatever break .......sex is permissible,with or without a partner, but make it a quickie eh?

put in fridge
Spread a liberal coating of shortening in your pie pans making sure to cover the entire inner surface.........(I really didn't have to specify "the inner surface" did I?

grease pans
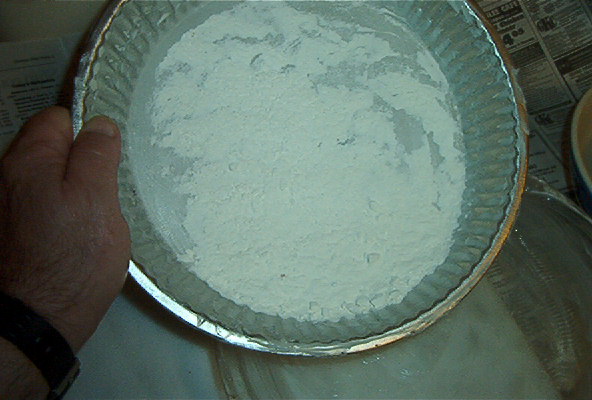
Now,dump a gob of flour into the pie pan and twist it and turn it around to cling to all the shortening and coat all the surfaces.........when you are done with the first, tap it into the second and tap what's left in the second onto your rolling surface.
flour pans
Be liberal with the flour you put on your rolling surface........I use a marble pastry board and rolling pin. They were pretty inexpensive, can usually be found in places like target, and they are more than mere decorative affectations. Marble has the quality of remaining about 11 degrees cooler than its ambient surroundings and helps keep the dough workable.........its also why they use marble for benches in a steam bath, to keep you from blistering your goodies when you sit down.
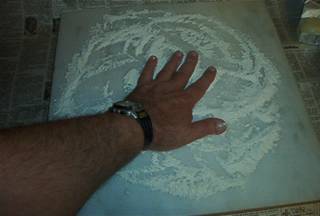
flour board
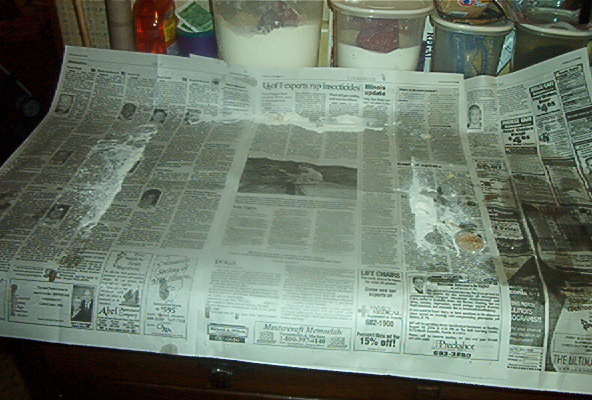
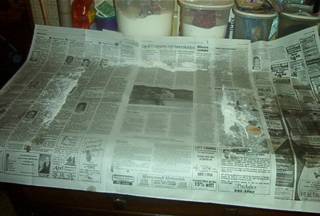
You may notice the edges of newspaper in some of the following pictures. It is a given that some of the flour is going to work its way off the rolling surface. Newspaper will facilitate the clean up process.
A wooden pastry board, or a large wooden or plastic cutting board (18" X 18") will do as nicely........just don't use it for cutting......the scratches and grooves made by your knives will make dough stick to it no matter how much flour you use.
There are pastry mats and pastry cloths that you can roll out dough on......they may work well for you. In the absence of any of these things, the counter top or table top will do nicely.
I mentioned that one of the things that may give the beginner fits is lifting the finished crust off the board and transferring it to the pie pan. I still have to exercise care, but,as I said, this dough is comparatively easy to work with in that regard........just use lots of flour so it won't stick to the rolling surface.
My Mom rolled her crusts out on good ol' cheap wax paper and used that to transfer the crusts to the pan..........hey, whatever works for you, do that.
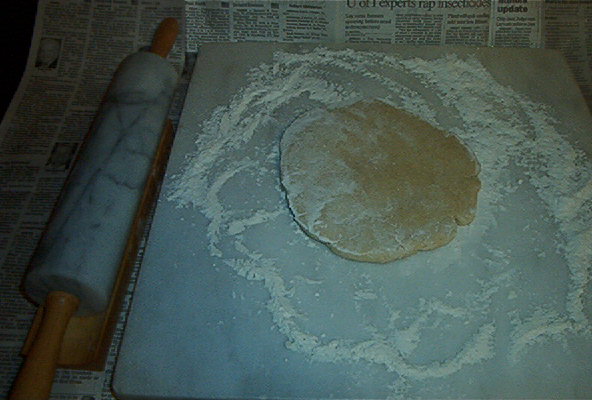
You are going to make two bottom crusts and two top crusts.......you have a nice uniform ball of dough in the fridge. Cut it into four pieces and shape the piece you are going to work with into a "pattie". Dredge this on both sides in the flour on the surface......respread the flour on the surface and lay your dough patty on the board.
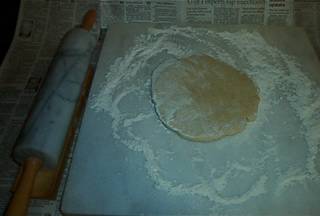
dough on board
Spread some flour on your rolling pin and working from the center to the outside with a gentle pressure roll your dough into a rough circle. When you've flattened it out and about doubled the circumference of the patty you started out with, lift it up, spread some flour under it and turn it over.........smooth some flour on the top of the dough and roll it out some more...........

roll dough
When you've rolled your dough out to a uniform thickness about 2 or 3 inches bigger around than the pan you're going to use, you are ready to position it in the pie pan.
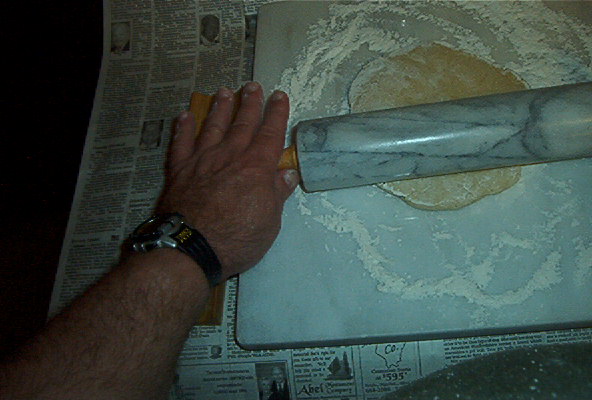
This is the point where most aspiring pie makers throw in the towel.........but if you are careful and patient and have followed instructions, (or use one of the "tricks") it shouldnt throw you.
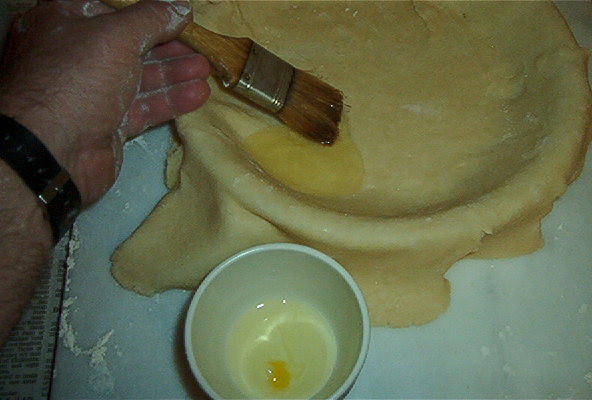
My method is to gently detach the top edge of the crust from the board and roll it up loosely. Place the pan on the surface where the crust was, and gently lift the roll of dough, position it and roll it back out into the pan. You are going to seal the inner surface of your pie with egg white.........if you get a tear in your crust, just make a little "patch" with some of the overhang and glue it in place with egg white............(this is the bottom crust, who is going to see it??)

roll up
I use the same kind of brush as a pastry brush that I use for basting when barbequeing.....a 99 cent 1 1/4 inch natural bristle brush I bought at the hardware store. That is, unless you want to spend $2.50 on the same brush with the words "pastry brush" stamped on it. If you don't have a brush, use your fingers. Separate the whites from a couple of eggs into a small dish and spread over all the inner surfaces of the pie.
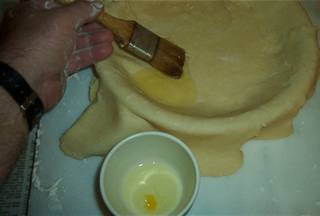
seal dough with egg white
Alrighty then.............the hard part is over, it's all down hill from here.
Preheat your oven at this point to 400 degrees.
We are going to thoroughly drain the apples and transfer them into a large mixing bowl. I have two large, inexpensive tin bowls that are invaluable for stuff like this..........plenty of room to work in and slop stuff around in, and easy to rinse out and keep ready to use.
This isn't hard, but you want to work rather quickly. The sugar will really draw the moisture from the apples and you want to get the filling into the crusts before the juice that is drawn out by the sugar gets to be problematical. The point being, dont get the idea that you can cut a step by mixing the filling up before hand. Now.........if you have a partner, he or she can make the filling while you are sealing the crusts, and transfer it into the pies while you are making the top crusts.
However you do it, you want to mix the filling and immediately put it into the shells..............and don't forget to allow time for the oven to preheat!!!
As a side note or two here;
I saw on a cooking show that putting a flat (not the kind with sides) cookie sheet under the pies while they bake will make for a flakier bottom crust........hey, worth a shot, can't hurt.
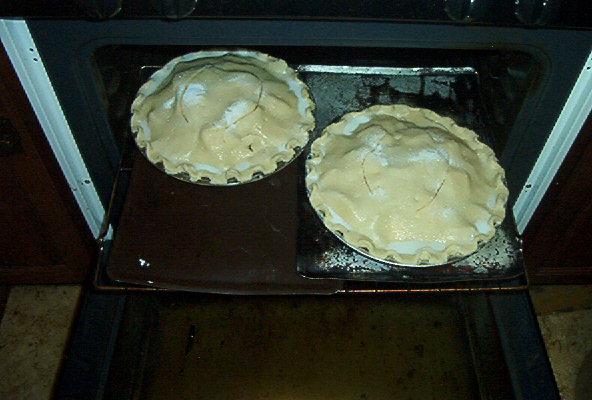
No matter how carefully you seal your pies, one or the other or both is going to leak sugary liquid into the inside of your oven. Put some foil under them........that liquid is going to carmelize and become as hard as a diamond, and stick to the floor of your oven like the dates on a tombstone.
The pies can't go onto two different levels unless you plan to switch them around and add a little time to the total they are in the oven........you want them side by side, not touching either each other or the sides or back of the oven. The rack you put them on will be in the middle position.
These pies are really thick....they'll be in there for 15 or twenty minutes longer than the recipe calls for and at 400 degrees the whole time. You'll want to take strips of foil and loosely cover the crimped edges of the pie until the last 20 minutes or so of cooking..........this is also why the thickness of the slices is so critical.
If you don't allow a little extra cooking time, the apples will be a little too "al dente" and a little too uncooked tasting.
O.K. where were we............oh yeah, making the filling.
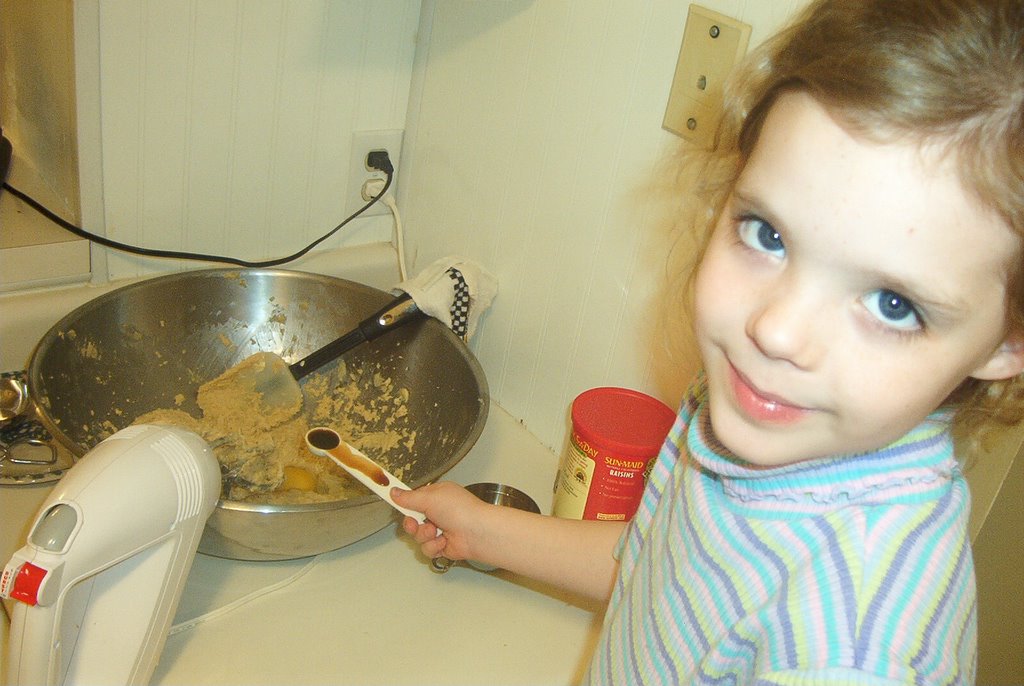
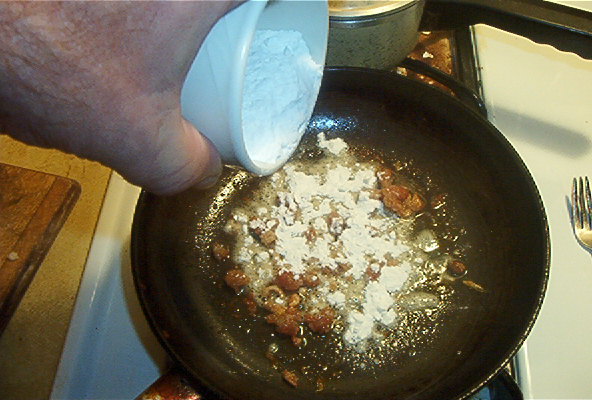
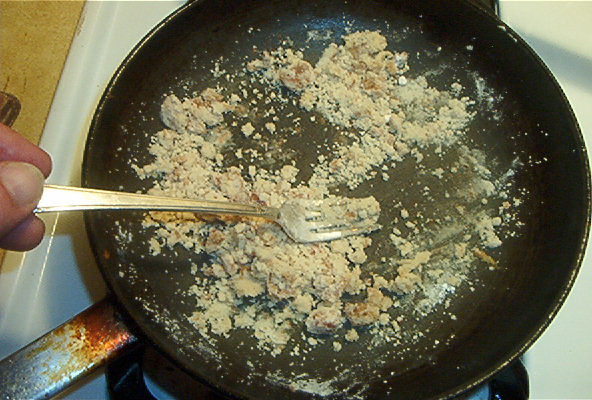
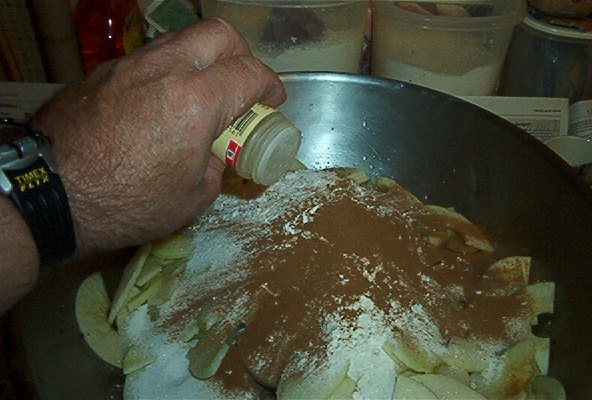
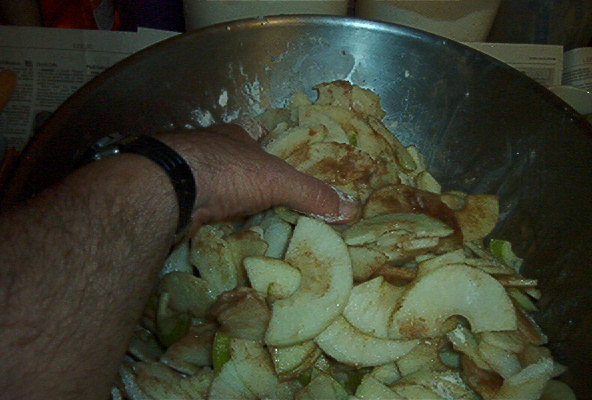
Add the sugar, flour, cinnamon, and nutmeg to the drained apples, mix all up and divide in equal measure into the shells..........there will be a good bit of liquid in the bottom of the bowl........scrape it into your measure and divide it equally into the shells.
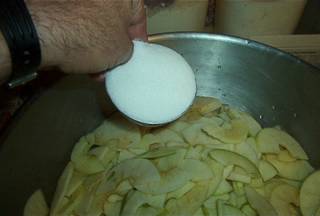
add sugar to apples

add flour
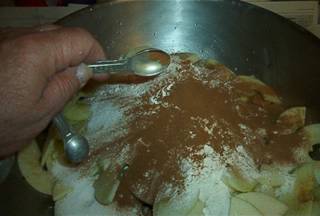
cinnamon

nutmeg
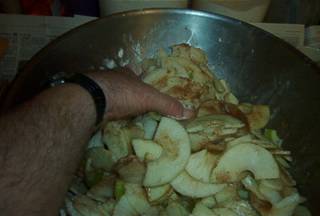
mix well
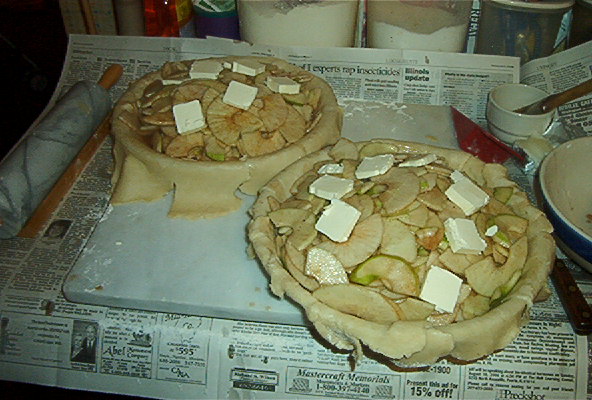
I use a stick of real butter per pie cut into pats and dotted around the filling.
Excessive???.........of course it is, but have you ever heard of a health food pie.
I repeat, this is not a health food blog.......I am a pagan and a hedonist.
This is pure indulgence, folks. So unless your heart is already on the verge of exploding from too many cocktails, or cigarettes, or cheeseburgers, or deep fat fried chunks of processed soy bean derivatives or melted cheese cassaroles..........use the butter.
If you insist on using margarine, use one that has the same fat content as butter (check the label). The low fat spreads replace the fat they remove with water and aren't very good substitutes for either butter or a full fatted margarine in recipes.

dot with butter
Now all that remains is to repeat the process of crust making to get a couple of tops on these pies and get them in the oven.
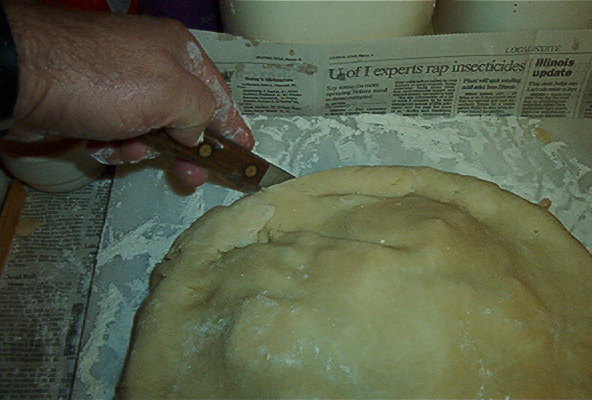
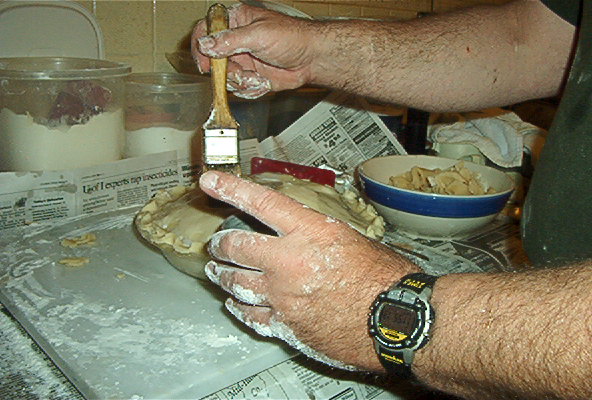
Run another bead of egg white around the rim of each pie before you set the top crust on it..........position the top crust and trim it to the edge of the pie pan.
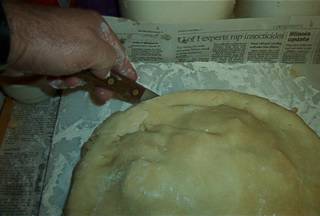
trim crust
Crimping the edges is a simple matter of placing two fingers of one hand on the edge of the crust separated by the width of a finger. Take the index finger of the other hand and pull up on the crust to create a fluted effect.
Either that or go around the crust with a fork and press it down gently to create a seal, leaving the impression of the tines of the fork on the edge of the crust.
The point is to seal the top to the bottom and (ideally) prevent the juice of the filling from boiling out onto the bottom of your oven. You want to keep all that good stuff in the pie.
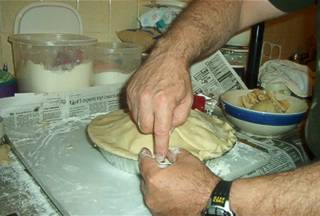
crimp edges
We are now going to brush the entire tops of the pies with milk and sprinkle sugar on them to glaze them..........

brush with milk
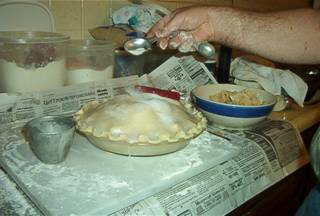
sprinkle with sugar
.........and cut vents in them. This is important.......if you are going to get a boil over, you don't mind if it happens onto the crust.
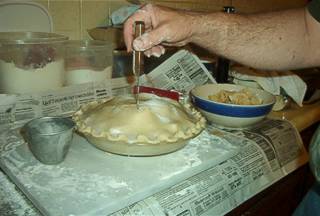
cut vents
Now to pop them into the pre-heated oven........arranging them on the middle rack as we discussed earlier.
The pies will be in there for about an hour and 15 minutes. We'll do a little clean up.........remember the newspaper?
clean up
Aren't I clever.........?
Judging when to take the pies out of the oven is a bit of a zen, "use the force Luke" sort of a deal....... or you can take a fork and reach into one of the vents and fish a bit of filling out. Careful though.....this stuff is sticky and hot enough to cause 4th degree burns.
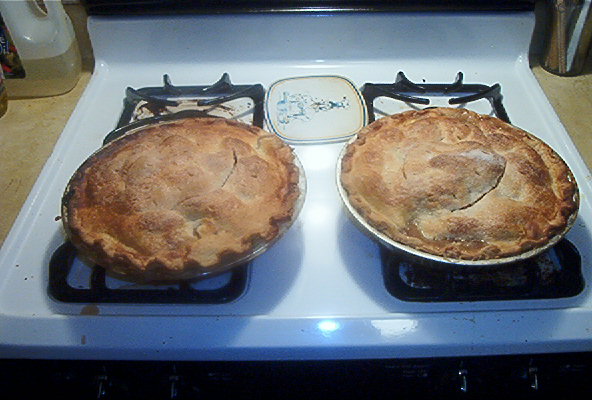
In any event, when the pies have been in for about 50 minutes, remove the foil you used to shield the edges so the tops can brown nicely for about 15 or 20 minutes.

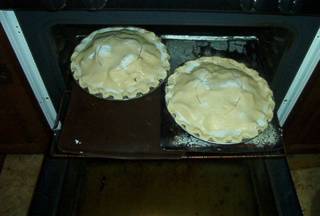
These babies will never win first prize in a beauty contest, or be featured in one of those magazines you read in a dentist's office, but they're as pretty as you thought the girl you married was on your wedding night and right up there with sex in terms of the sensual delight you will derive from the caramelly sweet apple flavor and cinnamon aroma.
One 10 inch pie is thick enough and dense enough with fruit to give up eight pieces that will stuff you pretty good ........especially if you serve it with a premium, high butter fat vanilla ice cream like Haagen-Dazs.........(go ahead, treat yourself after all that work, why not???)
So, what are you waiting for...........?
Go make a pie! Share it with people you care for.
Enjoy..........
Thus endeth the lesson